Monday, September 15, 2014

member news - Michele Leavitt


SAQA member Michele Leavitt has two pieces of her work juried into the La Conner Museum of Quilts and Textiles, Quilt Festival on October 3,4,5 2014.


Dutch Island (light house)

Manhasset Bay (sunset over water) 
 
Manhasset Bay (sunset over water) and Dutch Island (light house) are both machine applique quilts.

She also has a piece traveling in the SAQA Radical Elements exhibition.  
 
Carbon
2013, 36" X 22"
 
Carbon was created using duct tape, contact papers, aluminum foil, candy wrappers, ribbons, metallic fabrics, eyelets and jewelry wire.

Friday, September 12, 2014

member news - Salley Mavor

SAQA member Salley Mavor has work appearing in three exhibits this fall and two of them are right here in Massachusetts.  Read on for the details...

Around the Pond and Through the Woods ~ Sculpture Walk at Old Frog Pond Farm, Harvard , MA . Opening Artist Reception, Sept. 21, 2014, 1- 5 pm. Salley Mavor’s sculpture, “Hither and Yon” will be included in the outdoor exhibit. Open weekends, 1 – 5pm until Oct. 5.

 
Oct. 10 - March 22, 2015 ~ Salley Mavor’s original fabric relief illustration, “Elsie Marley” from her book Pocketful of Posies will be in the exhibit  Good Night, Sleep Tight: Art from Children’s Literaturewhich will feature over twenty original illustrations from classic and contemporary children’s books woven around the themes of bedtime, dreams, and lullabies. Concord Museum,  Concord , MA .

 detail of "Elsie Marley"
 
Two of Salley Mavor’s pieces, Birds of Beebe Woods and Rabbitat will be part of Art Quilts XIX: Permission to Play at Vision Gallery, Chandler Center for the Arts, Chandler , Arizona .  Nov. 7 – Jan. 17, 2015

Thursday, September 11, 2014

member news - Betsy Abbott

SAQA member Betsy Abbott has just launched a new website:

http://www.betsyabbottquiltart.com/


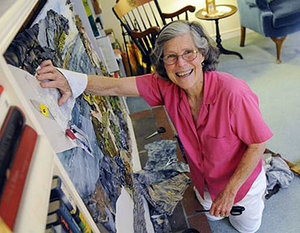
Betsy Abbott at work in her living room.

As a lifelong sewer, I am drawn to the colors and textures of fabric and thread.  Long before I ever saw a studio art quilt, I dreamed of making quilts to tell a story, hold a moment in time, or convey a beautiful image.  But because I had no art background, I did not dare to think that I could create what I saw so clearly in my head. click here to continue reading about Betsy...


Tuesday, September 9, 2014

member workshop news

Sue Bleiweiss is teaching a two day fabric dyeing and coloring book fabric collage class at Quilters Way in Acton MA December 6 &7,2014.


Instructor:   Sue Bleiweiss
Format:      Two 5-hour sessions
Date:          Saturday + Sunday, Dec 6 + 7
Time:          10:00am-3:00pm


Join artist Sue Bleiweiss to learn her “coloring book fabric collage” technique—a fused style that includes black lines reminiscent of the coloring book pages we colored as children. Sue takes students through her process of creating an art quilt from start to finish,from hand dyeing the fabrics all the way through binding the quilt.

In this two day workshop, you’ll learn how to dye fabric the easy way. Even if you’ve never dyed fabric before you’ll finish with a pile of beautiful hand-dyed fabrics. You’ll spend the first day of the workshop dyeing your fabric using Procion dyes and learning how to create your own tone-on-tone fabrics using Jacquard Color Magnet. Color Magnet is a dye attractant that magically attracts more dye where it is applied,creating a unique,two-toned effect.
 
On the second day of the workshop,you’ll return with your pile of hand dyed fabrics and use them to create an art quilt. Students will have the option of creating a version of Sue’s Tutti Frutti Lane quilt or the smaller 3 Little Houses quilt. Both quilts are created using raw-edge,fusible appliqué combined with Sue’s easy quilt-as-you-go construction technique.


Click here to visit the Quilters Way website and register for the workshop.  Space is limited so don’t delay!

Sunday, August 31, 2014

let's talk about taking photographs

At some point, regardless of whether or not you want to submit your work to an exhibition or not, you are going to want to take a photo of your work.  It might be to share it in a blog post, on your facebook page or to send a photo of it in an email to a friend.  You should always strive to take the best photo possible because after all, you spent all that time creating the quilt so don't take a photo that doesn't accurately represent what a beautiful piece of art it is.

But let's approach this from the point of view that you want to submit your quilt to a call for art.  You finish your piece and it's time to take a photo so what's the best way to do that?

First and foremost and I can't stress how important this point is: remember that in the case of a juried submission the photographs of your work are what the jurors are using to determine whether or not your quilt is going to be accepted or not.  The juror is not going to look at the photo and say, "well I think this is a good piece of work but the photo is not great so let me go pop over to the artists website to see if there is a better image of it".  In most cases the juror is not even going to know who the artist who made the work is.  So the photos that you submit need to be the best representation of your work.   There's an excellent blog post here by Kathleen Loomis who is one of this years jurors for the Quilt=Art=Quilt exhibit at the Schweinfurth Art Center talking about her experience with viewing the photographs of work submitted for the show.  She shares some excellent advice and tips about what you can do to improve your chances of being chosen for a show that is juried from digital images.

Do you need to go out and buy an expensive camera to take a decent photo?  Not necessarily.  Many of  the compact point and shoot cameras can take terrific photos if you make sure that you are taking photos at the highest setting the camera will allow.  So before you start taking photos consult your camera’s manual to make sure that you have the camera set to take as large and as high a resolution photo as possible.  Some cameras will let you take smaller lower resolution photos to save space on the cameras memory card.  You might find this information in your camera manual under “image size” or “image resolution”.

Here are some of my own tips:

Find a spot where you can hang your quilt against a neutral background.  This means you don't want to take a photo of your quilt on a bright red, yellow, purple, paisley, checkerboard or any other color or patterned background!  This is also not the time to take your quilt outside and hang it on a fence, over a porch railing or ask someone to stand behind it and hold it up while you take a picture of it.  If you don't have a wall with neutral color paint on it then consider covering your design wall with a clean piece of neutral color wrinkle free fabric stretched taut over it and photographing against that.  

Hang your quilt on the wall making sure that there are no pins, clips or other items you're using to hang the quilt showing.  Take the time to use a level to make sure that your quilt is hanging straight.

Light your quilt evenly across the surface.  This means you don't want to take a photo of your quilt with a swarth of sunshine coming through the pained windows across it.  Natural light is best but sometimes that's not an option and you have to use electric lighting.  This is fine but be aware of the color of the bulbs you use.  Some household bulbs can throw a yellow tint and it will effect the colors in the photo you take.

Here's an example of a quilt that I recently finished hanging on my photo wall:


So at first glance it looks pretty good and ready to photograph but look closely.  See the little spots of brown along the right and left top side edges?  That's the hanging rod sticking out.  Not a huge distraction you might be thinking but you wouldn't see that in a professionally shot photo.

The quilt is also not hanging straight.  This is easily fixed by using a level to straighten it.

This next image shows another thing to avoid when taking an photo of your quilt:


I was obviously not standing in front of the quilt when I took this shot.   You should always take your photos standing directly in front of your quilt.  I use a tripod when I photograph my quilts.  It was an inexpensive investment that really makes a difference in the quality of my photographs.  You'll find the one that I use here.

Take several test shots to check that the lighting is right.  Don't expect that your first photo is the best one.  I always have to take several shots in order to get the lights in the right place.  

Here are some terrific online resources for more information about taking photographs of your quilts:

Holly Knott has an incredibly comprehensive series of articles on her website about taking photographs of quilts:   http://www.hollyknott.com/stq/index.htm

The Bernina We All Sew blog has a series of posts by Kerby Smith on how to take great photos of quilts:

part 1: http://weallsew.com/2014/04/10/5-tips-for-taking-great-pictures-of-your-quilt/
part 2:   http://weallsew.com/2014/05/07/10-tips-for-photographing-your-quilts-and-sewing-projects/

There's some helpful information on the Modern Quilt Guild website:
http://themodernquiltguild.wordpress.com/2012/07/24/photographing-your-quilt/

The International Quilt Association has some great tips for quilt photography:
http://www.quilts.org/tips.html 

You'll find my previous posts about digital photography here.

Wednesday, August 27, 2014

Fiber Frenzy Exhibit


Fiber Frenzy, an exhibition featuring the work of nine fiber artists, will be on display in the Great Room Gallery of the Yarmouth New Church, 266 Route 6A, Yarmouth Port, from 12 noon to 5 PM on September 7, 13, and 20, and at 7 PM before concerts in the Audience Room and during intermissions on September 6 and 20. Opening reception is set for Saturday, September 6, from 5 to 7 PM.

Reflecting innovative approaches with varied mediums, the art collection includes weavings by Corinne Lilie and Jane Parhiala, felted sculpture by Toni Newhall, fabric collage by Sheila McAvoy, unique sculptural dolls by Madeline Arnault, landscapes in fiber with thread painting by Ro Morrissey, abstract fiber designs by Stephanie Panasci, artisan rugs by
Susannah Wheelwright, and art quilts by Elaine Skoler.

Tuesday, August 19, 2014

SAQA Benefit Auction


This is your chance to own beautiful, unique art quilts by some of the world’s finest artists. Plus, your purchases help increase the recognition for art quilts and the artists who make them while supporting SAQA’s exhibitions, publications, and education outreach. Thanks to generous donors and bidders in 2013, the Benefit Auction raised over $65,000!

View the Quilts
Dream Collections
View Artist List and Quilt Details

The Benefit Auction is run in three sections for 6 days each, with a special later section accompanying the International Quilt Festival in Houston. A different group of quilts is available for online bidding each week. Get all the details here.